Saving Images For Your Website

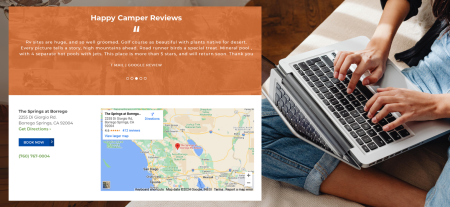
Big Rig Xpress designs, manages, hosts, and even makes needed changes to your business website (up to one hour per month) for a low monthly fee of $199. But that doesn’t mean you can’t add images to your gallery and make minor edits yourself. Your website design also comes with a training session showing you how to login and edit your business site. However, improperly formatted photos can dramatically affect how fast your site loads for your customers. Once you know the basics, saving images for your website is quick and easy.
Size Does Matter
Modern cameras can take huge photos at high resolutions, which is excellent for printing high-quality 8 X 10 inch images. But, unfortunately, they are way too big for websites and digital screens. Digital images are typically measured in pixels. The most important thing to remember when saving images for your website is that more pixels equals larger photos, and the larger a picture is, the longer it will take to download.
Google doesn’t like large photo file sizes and will ding your website if the images on your site aren’t optimized. Sizing your photos before uploading them will help them load fast and keep your site closer to the top of search results.
Image Sizes For The Web
The image size (height and width) directly correlates to your screen size. So, for example, a photo that is 1920 x 1080px will take up the entire screen that is set to the same size. Trying to display an image larger than the display size wastes space and page load time. So what is the best size for web images? It depends on how you will use it.
Image File Types
There are many options when it comes to file types like JPG, PNG, GIF, and others. When saving a file for the web, you will want to use JPEG or PNG most of the time. We could get into lots of details on how these two file types differ. If you don’t handle graphics for a living, just remember two rules to get the smallest possible file size.
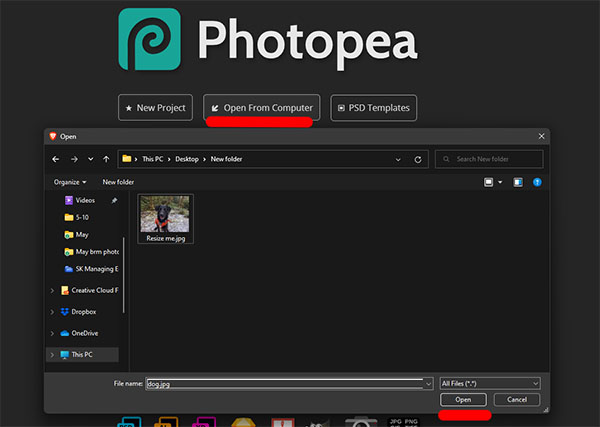
A Free Online Tool For Saving Images For Your Website
Photopea is a free online image editor with many of the same functions as paid editors like Photoshop. However, it’s free to use and has everything to optimize your photos quickly before uploading them to your Big Rig Xpress website in 4 easy steps.
1. Go to Photopea.com and click “Open From Computer.” Go to the folder where your photo is located, select it, and click open.
2. Once the image is open, click “File”, then hover over “Export as” and choose the desired file type from the menu. The example image is a photograph, so we’ll use JPG.
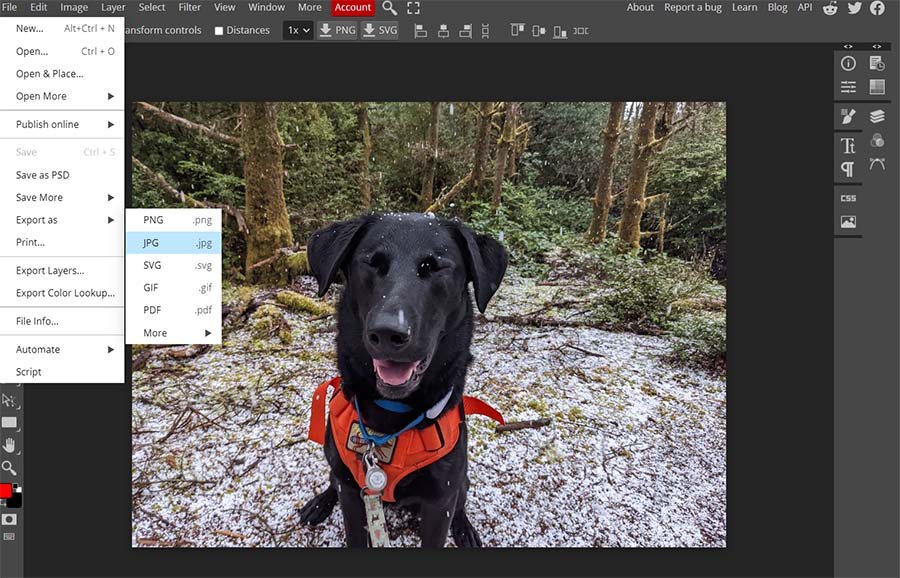
3. The “Save for web” window will come up, and you will want to adjust the following settings.
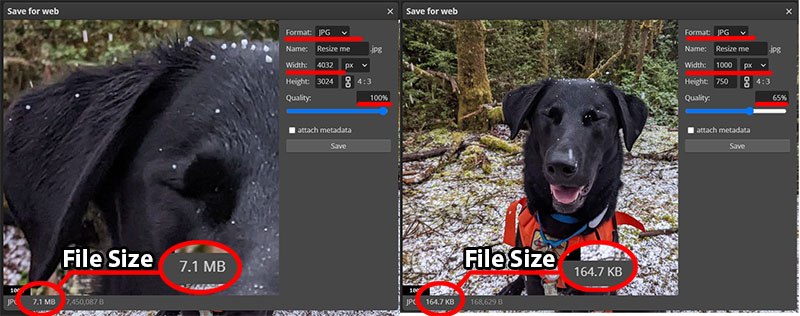
(Left) The photo started at 4032 x 3024px at 100% quality resulting in a file size of 7 MB. Customers with slower than average internet connections will have to wait 3 or more seconds for that one image to load.
(Right) Changing the width to 1000px (Photopea automatically adjusts the height) and dropping the quality to 65% results in a 164 KB file size and a 0.0656 second download time for the same customers.
4. Click save once you have adjusted the settings for the smallest file size possible. It may be good to create a separate folder labeled “Resized Images” and save them as individual files to keep the original high-resolution photo. You have now optimized your photo for the web.
Big Rig Has You Covered
If you have a Big Rig Xpress site, there’s an even easier method for saving images for your website. You get one hour of updates included in your monthly subscription. So send your photo updates to us, and we’ll make sure they are optimized and on your site. That’s just one of the many features you get with your website as a service.